Skip to content

Posts tagged ‘Photography’

Hiking in the Dolomites, Epilogue

Thanks for reading this series of posts.  I wanted to say a few final words.

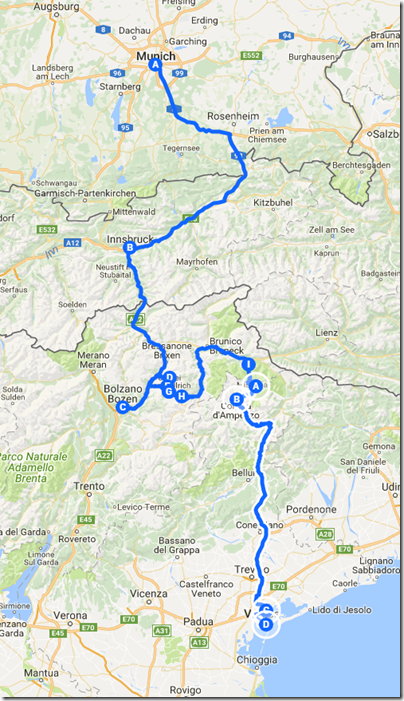
First, about the location:

EntireTrip

I’d been to Munich many times before, but everywhere else was new to me.  I loved everything about northern Italy—the scenery, the hiking, the people, the mix of cultures, the food, the wine, and even the fact that everything seems to run just a few minutes behind schedule. Smile

Second, let’s talk about gear.

I don’t usually talk much about clothes on this blog, but a few items were so good I want to call them out:

All were both comfortable and functional, which is what you want in travel wear.

For photo gear, I had to trim weight because I would be carrying it all on my back for many miles.  This was different than last fall’s trip to Alaska, where the biggest consideration was the weight limitation for the charter flights to and from Lake Clark.  Once I was at the lodge in Alaska, I never had to carry my gear very far.

In years past, I would have carried all Nikon full-frame gear—I was seriously considering bringing a Nikon D810, 17-35mm f/2.8, 24-120mm f/4, and 80-200mm f/2.8.  But, as I’ve expanded my Fujifilm mirrorless collection over the last couple of years, the lighter weight Fujifilm X-T2 seemed like a better alternative.  The weight difference between Nikon and Fujifilm in body and equivalent lenses was about 4 pounds.  For the entire, fully-loaded photo backpack, the Fujifilm system allowed for a sizable 20% reduction in weight.

I also don’t think I was giving up anything in terms of image quality.  The Nikon has more megapixels, but the Fujifilm is an excellent camera, too—especially for landscapes.  I’d still choose the Nikon over the Fujifilm for sports or bird photography, but I wasn’t doing any of that in Italy.

The next consideration was how to carry all my photo gear, including my tripod, and the things I’d need at the mountain huts—toiletries, rain coat and pants, an extra layer for warmth, extra camera batteries and memory cards, a pack cover, etc.

After a little research, I found that a backpack I already owned would be a good option, the Lowepro Fastpack 350.  It has a lower padded compartment for camera body and lenses, and an upper compartment for whatever you can stuff in there.  One major downside of the pack is that there’s no consideration for a tripod.  I attached my tripod by putting the feet into the small mesh pouch on the side of the pack, and attaching a small bungee cord to the pack’s top handle, and wrapping it around the top of the tripod.  This worked well enough, though it wasn’t entirely secure.

I also wished that my pack had a rain cover.  To make up for that, I bought the REI Co-op Duck’s Back Rain Cover – 40 Liters, which I used several times.  It was a worthwhile investment.

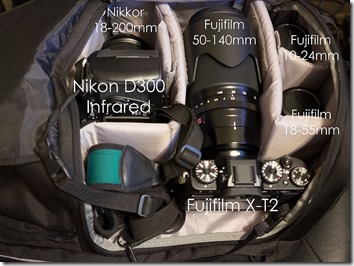
For camera gear, I carried:

All of the gear was used extensively.  Total weight, including the pack, was about 17 lbs.

_DSF6618

I want to give a plug for the Really Right Stuff BXT2 plate.  Up until a couple of weeks before the trip, I was just planning to use a generic Wimberley plate for the camera.  The one annoying thing is that you have to remove the plate to get to the battery compartment.  I went ahead and bought, with a few days to spare, the BXT2, which is constructed in a way where you can still access the battery without taking off the plate.

There was one interesting little feature to the BXT2 which I initially considered a gimmick.  The plate has a slot and a magnet to hold an Allen wrench in place.  When one of the other photographers asked, “Hey, does anybody have an Allen wrench handy?”, I was able to immediately pull it out.  The gimmick is actually a pretty handy feature that I grew to appreciate.

You’ll note that I chose to bring a pretty small tripod—maybe four feet tall at its maximum.  There were several times I’d wished for my larger tripod, but there were many more times I was glad that I wasn’t carrying the extra weight.  (My large tripod weighs almost double what my small tripod weighs.)  One thing that helped me cope with the small tripod was the X-T2’s bidirectional tilt-screen display.  I didn’t have to kneel down to look through the viewfinder; I could tilt the screen up in either portrait or landscape orientation, and compose more easily standing up when I wanted to.

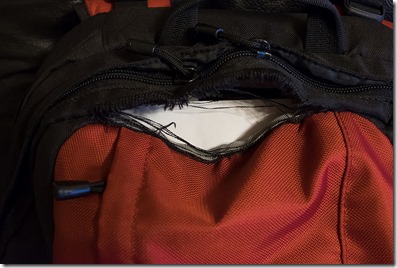
I did have one gear failure near the end of the trip.  On the morning of the hike to the Locatelli hut, I noticed a small 1” tear along the seam of the upper part of the backpack.  By the time I got to the hut, it was 3”-4” long, and by the end of the trip, the tear was about 5”-6” long.  The backpack wasn’t really designed for two camera bodies, so it probably suffered from having the extra weight.  It sufficed to get me home, but I’m going to have to replace this backpack now.

_DSF6619

Finally, I want to give a plug for Kerrick James and KJPhotoSafaris.  Jen and I have done several photo trips together, and we’ve kind of outgrown the “photo workshop” experience.  We self-organized our trip to Alaska’s Lake Clark National Park last year, and Jen’s family has self-organized many trips to Africa through the years.

But Kerrick’s trips are different.  First, Kerrick and Julie are genuinely nice people who are pleasant to be around.  Second, Kerrick is a top-notch, working photographer.  As such, he’s learned to be a problem-solver… “The weather’s terrible, so here’s what we’re going to do to make the most of it.”  Third, it feels more like we’re all collaborating.  Kerrick shares his valuable and experienced perspective on the scenes before us, but he is also keenly interested in our own points of view and the images we’re able to create.  It’s very much a feeling that we are all teaching and learning together.

So, if you’re an intermediate to advanced photographer looking for an active photography trip, check out KJPhotoSafaris.  You’ll end up in a great place with great people.

Thanks to my friends, new and old, that were part of this trip.  Thank you for being teachers.  Thank you for the camaraderie, and for the bad jokes occasionally punctuated by a good one.

Photo Gear for Alaska

For one important reason, I put a lot of thought into what to take on this trip:  weight.  The charter aircraft from Anchorage had a weight limit, and we were bringing a lot of heavy camera gear with us.  So, I got out the kitchen scale and started weighing lenses, camera bodies, tripods and heads, and even my photo backpack.  The weight limit required a lot of compromises.  In the end, I chose about 30 lbs. of photo gear to bring with me…

Weight (lbs.)
7.5 Nikon body and lenses
6 Fuji body and lenses
6 Tripod & head
6 Backpack
4.5 Computer, memory cards, chargers, tools, etc.
30 Total

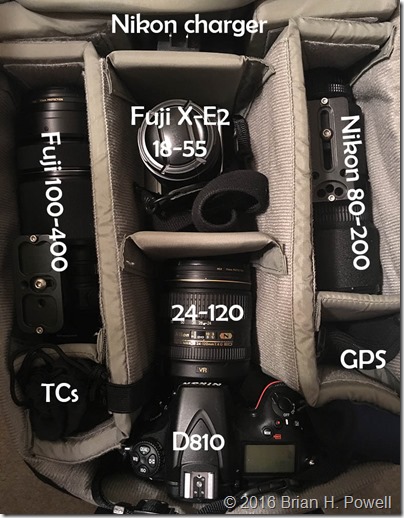
I put all the gear into my Lowepro Nature Trekker AW backpack (a model which is now discontinued).  “AW” means all-weather; it has a built-in rain cover I could use when needed.  With the unpredictability of Alaskan weather, this seemed like a good idea.  Here’s how I packed everything in.  (I ended up replacing the 80-200 with an 80-400.)

Backpack

As you can see, I took two camera systems:  Nikon DSLR and Fujifilm X-series mirrorless.  I considered going all Nikon or all Fuji—even waffling back and forth a week before the trip.  By taking both, I got to test both camera systems in nearly identical circumstances, and compare how they performed.


For the Nikon system, I brought…

  • D810 full-frame body
  • 24-120 f/4 lens
  • 80-400 f/4.5-5.6 lens


For the Fuji system, I brought…

  • X-E2 APS-C body
  • 18-55 lens
  • 100-400 f/4.5-5.6 lens
  • 1.4x teleconverter


When we were out with the bears, we had to keep all our gear with us—no leaving it in the ATV trailer where bears could find and chew on it.  We were thus discouraged from taking too much gear out into the field.  I’d typically take one body with one long lens.  If I took the Nikon with long lens, I’d sometimes take the lightweight Fuji with the 18-55 lens for landscapes.  I ended up not taking the backpack or the rest of the gear into the field after the first day.

The vast majority of the time, I used the Nikkor 80-400 and Fuji 100-400, and I thought each was a good choice.  I didn’t use the 1.4 TC after the first day or two; on the APS-C body, the effective 150-600mm focal length without the TC was more than enough.  On the Nikon, I rarely wished I’d had either an APS-C body or teleconverter.  The Fuji 100-400, in particular, is a superb lens—hand-holdable up to five stops, and without the vignetting problems of the Nikkor 80-400.

I rented the Nikkor 80-400 from borrowlenses.com.  I felt like this was a great deal—12 days for less than a tenth the price of buying the lens new, and the 80-400 is a specialty lens I wouldn’t normally use in my other shooting.  Let me know if you’re planning to rent from borrowlenses.com; I can likely get you $20 off your first rental.

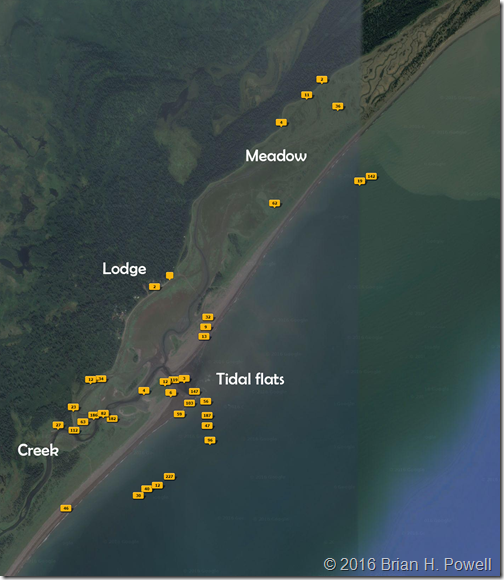
I brought along my di-GPS Pro receiver for the Nikon body.  This GPS receiver, from Dawn Technology in Hong Kong, plugs into the Nikon and geotags the images.  Then, in Adobe Lightroom, you can view a map of where you took your photos.  (The numbers represent how many photos I took in each spot.)

(Click any image to enlarge.)

gpsmapl

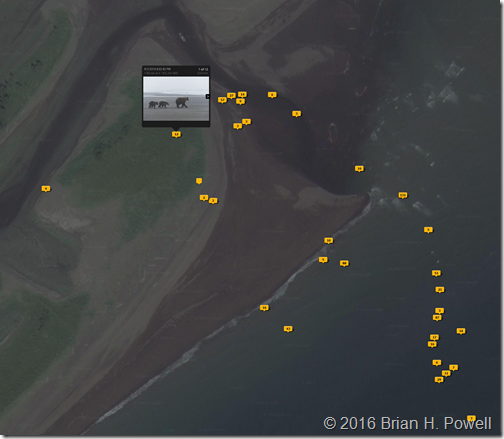
As you keep zooming in, you can see more and more detail.  Here’s the mouth of the creek, where the bear fish and clam much of the time.

gpsmap-beach


As I mentioned above, I was curious how the two camera systems fared compared to each other.

The summary is that the Nikon DSLR is clearly a better camera than the Fuji X-E2.  It’s also bigger, heavier, more expensive, is faster, and has more megapixels.  But the X-E2 also did a great job, too.  With a slight edge towards the Nikon, the number of “keeper” photographs was about even between the two cameras, as were the total number of photographs out of the thousands I took.

One key speed difference is that the Nikon has buttons readily available to adjust ISO, autofocus, and almost every other camera setting.  On the Fuji, many settings are behind menus that you have to navigate through.  I was not as familiar with some of the lesser-used Fuji options at the beginning of the week, and by the end of the week, I had learned how to get more out of the Fuji than I could at the beginning.  I started and ended the week still loving both cameras.  I think you could take either kind of system and come back with great photographs.

Would I recommend that anyone take two different camera systems with them to Lake Clark?  No.  But I would take two bodies—one as a backup for the other.  I’d also recommend taking a couple of lenses:  First, a 100-400 lens, ideally with a 1.4X teleconverter.  The Sigma 150-600 lens would be an interesting alternative.  Second, I’d take a shorter landscape lens—a 24-70, or 24-85.  A 100mm lens is too long to do much in terms of landscapes, or snapshots that help tell the story of your trip.


Rounding out my photo gear choices, I brought my Induro CLT304L tripod, with a Really Right Stuff BH-40 ballhead.  I briefly considered my alternate, smaller, lighter-weight tripod, a Gitzo G1027 Mk II (no longer available, but similar to the Mountaineer Series 0 tripod).  I’m glad I took the larger tripod; I would have been frustrated by the low height of the smaller tripod—and probably frustrated by having a somewhat less sturdy platform.  I absolutely love the RRS BH-40 ballhead; I’ve had mine for years.  I use Wimberley and RRS plates for my cameras and lenses.


One final note on other tools to bring along…  I brought a small folding hex (Allen) wrench set, useful for adjustments to the tripod mounting plates.  I forgot to bring anything to clean the camera sensor, and I started out the week with a noticeable piece of dust on my sensor.  Fortunately, one of my traveling companions had brought his blower (I use a Giottos Rocket Blaster), and I borrowed it one day at lunch.  I’d bring at least two, and preferably three, batteries—maybe more depending on how efficient your cameras are, and how much you shoot.  It’s convenient to swap out batteries at lunch for a fresh set.


I brought a small laptop computer with a large internal hard drive, along with a memory card reader so that I could back up my images every day.  The memory card reader failed—but fortunately, I had the right cables for connecting the computer directly to the cameras, so I backed up that way.  Having a computer also let me see how well I was doing at capturing photos, since I could view the images full size.  As an example, I could tell that my Fuji photos at the beginning of the week were great when the bears were relatively still, but the Fuji did a terrible job of continuous autofocus when the bears were running as they fished.  By adjusting to use only the mechanical shutter (instead of the electronic shutter), and by switching from single-point focus to wide/tracking focus, the action photos got a lot better by the end of the week.  I’d never really thought about those choices before.


Do you have questions or comments (or even suggestions) about my gear?  Please comment below.

Bluebonnets

Thanks to a wet winter, we’ve had a really good spring for wildflowers in central Texas.  There are millions of bluebonnets and other wildflowers along the major highways in Austin.  (Thanks, Lady Bird.)

Sometimes, I think I take the wildflowers for granted.  Growing up in Texas, I’ve seen and photographed a lot of bluebonnets.  So rather than go out and photograph them, I’ve just been enjoying the wildflowers as I’ve been driving around town.

Do I really need another bluebonnet portrait?  Can I find a new, interesting wildflower composition I haven’t seen before?  Still, the flowers are so good this year, maybe it’s worth at least a little effort.

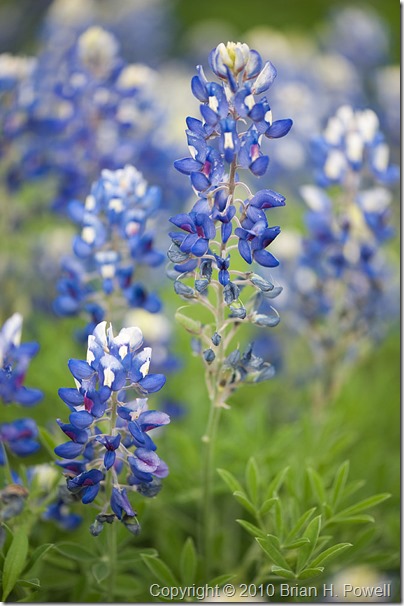
Texas Bluebonnet

Click to enlarge

So this past weekend, one of my best friends and I decided to try to find a good spot for wildflower photography.

But first, we had lunch.  And then we went shopping for a hat for her.  Next, we drove down some country roads, but didn’t find any wildflower patches that inspired us.  Then we gave up the wildflower search to visit a neighborhood garden tour, and to spend some time with a couple of friends who live there.

Near the end of the day, we still hadn’t taken a photo of wildflowers.  As we left our friends, we drove by a neighborhood park flooded with the distinctive, blue, state flower of Texas.  We got out our gear and walked around.  I took several dozen photos, but we were tired, and I don’t think either of us felt particularly inspired.

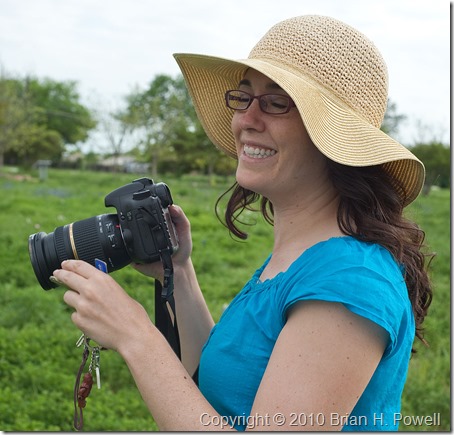
Back home at the end of the day, I went through my images, and selected a few worth keeping.  And when I saw the image below, I was reminded that it’s not about the photography, and it’s not about the flowers.  It’s about being inspired by the people who touch us.  It’s about friends who make us laugh.  It’s about sharing life.  Thanks, Nicole, for being part of it.

20100410_0091

Summer Trip Epilogue

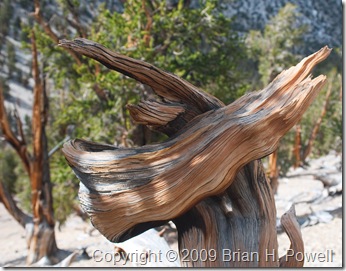
bristlecone_pineI’ve been back for a couple of weeks now from my trip to the Pacific Northwest. The return to my “normal” life was slow and arduous. I was so ready to turn around and escape again.

Don’t get me wrong; there’s a lot I like about my “normal” life. But there’s a lot I like about traveling and experiencing new places.

As I look back on the experience, the most meaningful parts of the trip were the beginning and end. I started my trip visiting my college friend Claire and her family. I ended my trip visiting my friend Tricia and her collection of Hood River friends.

Yosemite, the Eastern Sierra, and the Cascade Range are fabulous. But they don’t hold as much meaning to me as renewing and growing old friendships. So thank you, Claire and Trish, for being the bookends of a wonderful trip. I can’t wait to see you again.

I was inspired by the long hikes.

I was inspired by blue skies and mild temperatures.

I was inspired by the beauty of the nature around me.

I was inspired by the people I met along the journey.

I was inspired by the photos that came out of my cameras at the end of each day.

I was inspired by my friends around the world who followed me on this blog, on Facebook, and on Twitter.  I wish you could have come along.

Photographically, there were a few themes that really stand out about the trip…

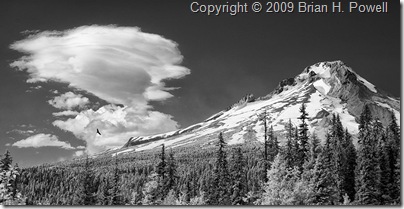
  1. Mount_HoodWith each use, I grow more and more excited about the images coming out of my infrared camera.  (I had my Nikon D200 converted to infrared by Life Pixel.)  I’m pleased to announced that I’ve started making prints for sale directly from my Zenfolio Landscapes Gallery, and the first three images are all infrared photos from this trip.  I’ll be expanding this gallery in the coming weeks and months.
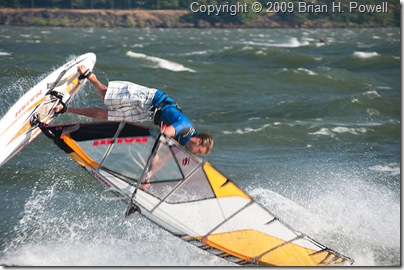
  2. windsurferI had a blast photographing the windsurfers on the Columbia River. It requires a lot of the same skills as bird photography. I flipped a few familiar settings on the camera, and I was ready to follow the action.
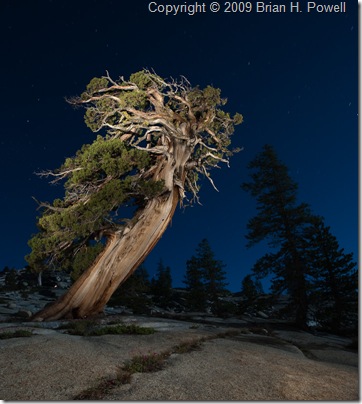
  3. Mikes_TreeI enjoyed learning about night photography from Michael Frye, Mike Osborne, and my fellow Ansel Adams Gallery workshop participants.

For those who care about equipment…

  • Nikon D200, converted to infrared by Life Pixel
  • Nikkor 18-200mm f/3.5-5.6 lens
  • Nikon D700
  • Nikkor 17-35mm f/2.8 lens
  • Nikkor 28-85mm f/3.5-4.5 lens
  • Nikkor 80-200mm f/2.8 lens
  • Canon Vixia HF S100 High-Definition Camcorder
  • Sandisk Extreme III and Lexar Professional CompactFlash cards, Delkin SDHC cards
  • Domke F-1X Camera Bag, my favorite camera bag ever
  • REI Lookout 40 Daypack
  • Gitzo G1027 Mark II Mountaineer Carbon Fiber tripod
  • Bogen/Manfrotto 3221W tripod
  • Really Right Stuff BH-40 Ballhead

And for those who care about numbers…

  • 688 photos with the D700
  • 516 infrared photos with the D200
  • 15 still photos with the Canon Vixia, and about 45 minutes of video

Yes, that’s right, I really took two tripods, three camera bodies, and four lenses with me. They all got used. (One tripod is lightweight and small for hiking.  The other is sturdy and great for night photography and windsurfing photography.)

Thanks for reading this blog. I can’t wait to take you along again. More to come soon.

Summer Trip Day Eight, First Week’s Retrospective

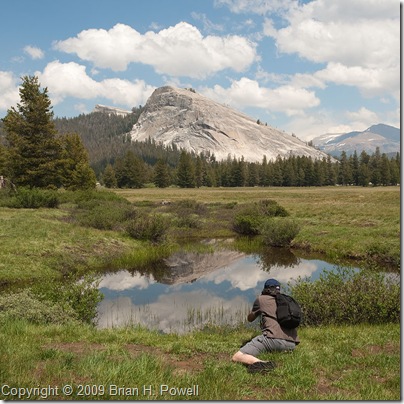
Lambert_Dome_Reflection

On Monday, I’ll be up early—doing laundry.  And I’ll be out late—doing photography.  So, I’m writing this blog post in advance, to say a few words about my first week.  I’m now halfway through my trip.

A week ago, I imagined this as a photography trip.  To me that means seeking the best light—up before down, out after sunset, putting myself in the right place at the right time, and trying hard not to let a good photo opportunity slip away.

Visiting the Rowell’s Mountain Light Gallery the other day, I was reminded about how Galen Rowell worked so hard to be at the right place, in case the light and all the other elements of a good photo came together.

But for me, it hasn’t played out this way.  Sure, I’m doing a lot of photography, but I’m not getting up at 3:45 AM to drive to some place an hour away to be there for first light at 5:00 AM.

This is okay for infrared photography; it actually works pretty well in the middle of the day. But for visible light photography, my mid-day hikes don’t yield the best photos.  During my five-mile mid-day hike through Devil’s Postpile, I had plenty of time to contemplate this.

Instead, this trip has been about discovering new places.  As I was explaining to a friend of mine, I have to get to know a place before I can really capture it with photography.  Galen Rowell would sometimes go back to a place many different times, waiting for the conditions to be right—the light, the wind, the snow or rain.  This explains why I’ve been to Bosque del Apache National Wildlife Refuge four years in a row.

This has become a kind of a scouting trip for me.  I’m figuring out what works and what doesn’t in places like Yosemite, the Bristlecone Pines, and Bodie State Park.  I’d like to come back to try different times of the year, with different weather conditions.

I believe that these places have more to say… more to reveal… than I can discover in a quick first-time trip.  I’ll be back again.  I’ll be more ready.  I’ll know more about what I want to accomplish.

In the meantime, I hope you’ve enjoyed the handful of images that I’ve selected for the blog postings for this first week of my trip.

I’ll be back with another post on Tuesday.

Summer Trip Day Zero, Austin

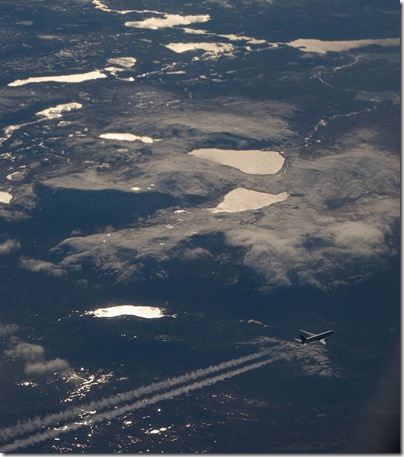
Jet at Sunrise

Tomorrow morning, I leave for Reno, Nevada.  I hope to see an old friend, and spend some time near Lake Tahoe. And then on to Yosemite National Park.

I’ve never been to this section of the country before, and I’ve been looking forward to this trip for a couple of months.

Yosemite, of course, has been made famous by photographers such as Ansel Adams, William Neill, and scores of others. I have a good friend who has mentioned that she’s intimidated by Yosemite—“how to take a unique, interesting picture when every square inch of the place has been photographed before?”

I also realize that the week before July 4 isn’t the best time to visit a major national park if I want to avoid crowds.

But I’m not going with a list of “must have” shots.  I’m not going with an agenda.  I’m not going with much of a schedule to keep.

Will I shoot the iconic pictures of El Capitan, Half Dome, waterfalls?  Probably.  Maybe just for my own memories—or for some photographic “B roll”, as it were. Or maybe I’ll find a perfect shot.

I do hope that Yosemite Valley will be one of those places that takes my breath away when I see it.  Places like Crater Lake in Oregon, or the Grand Canyons of the Colorado or the Yellowstone.

But if I go into this with fixed ideas of what I’m going to shoot, I might miss something beautiful right in front of me. Recently, I’ve had some great lunch conversations with one of my best friends about this—about being ready to let good things happen in life, rather than trying to force them to happen.

I’m optimistic. See you on the road.

In Search Of Conservation Photography

Conservation Photography

Are you using technology in green or environmental engineering?  I’m in search of a conservation photography project.  I’ll help document and publicize your project.  How can I help you?  Email [email protected].

In honor of Earth Week, I’m letting you in on my crazy idea.  As many of you know, I have a day job working in software, and I’m honored to work for a company that has “improve everyday life” in its mission statement.  I think most of us go through life just wanting to know that we’re making a difference somehow.  I try to make a difference at work.  I try to make a difference in the lives of my friends and family.

One of my goals for this year is to take on at least one conservation photography project.  I want to tell a story in photos and words that show the beauty of something you are trying to save.  A conservation photography project is more than just photos.  It’s the story around it.  It’s what we’re trying to save, and why and how we’re trying to save it.  It’s about the threats, and why those threats exist.  And as Cristina Mittermeier reminds us in her article, What is Conservation Photography? , it’s about what you do with the story afterwards.  I want to work on a conservation photography project that will make a difference.

The ideal project would be one that uses National Instruments products somehow, but I’m open to anything.  No, I don’t know how all of this is going to work out–that’s the crazy part, and through Twitter (twitter.com/brianhpowell), Facebook, and this blog, I plan to take you along for the ride.

Please spread the word–retweet this, post a link, email your friends who might have some ideas.  And email [email protected] with your thoughts.  Thanks!

Brian